

Photo by Roman Synkevych 🇺🇦 on Unsplash
How to sign commits for any open source Projects
Adding GPG key and configuring with your repository


Table of contents
In the Open source world, signing your commits is very important for compliance, and validating the person making the commit. A few days back, I was trying to contribute to the Direktiv Repository. I tried to follow the general way of making PR but noticed that I needed to set my computer up more to be able to sign my commits. This guide will help you set up your computer so that you can start committing to any open source project and won't have to worry if your commits are not signed :
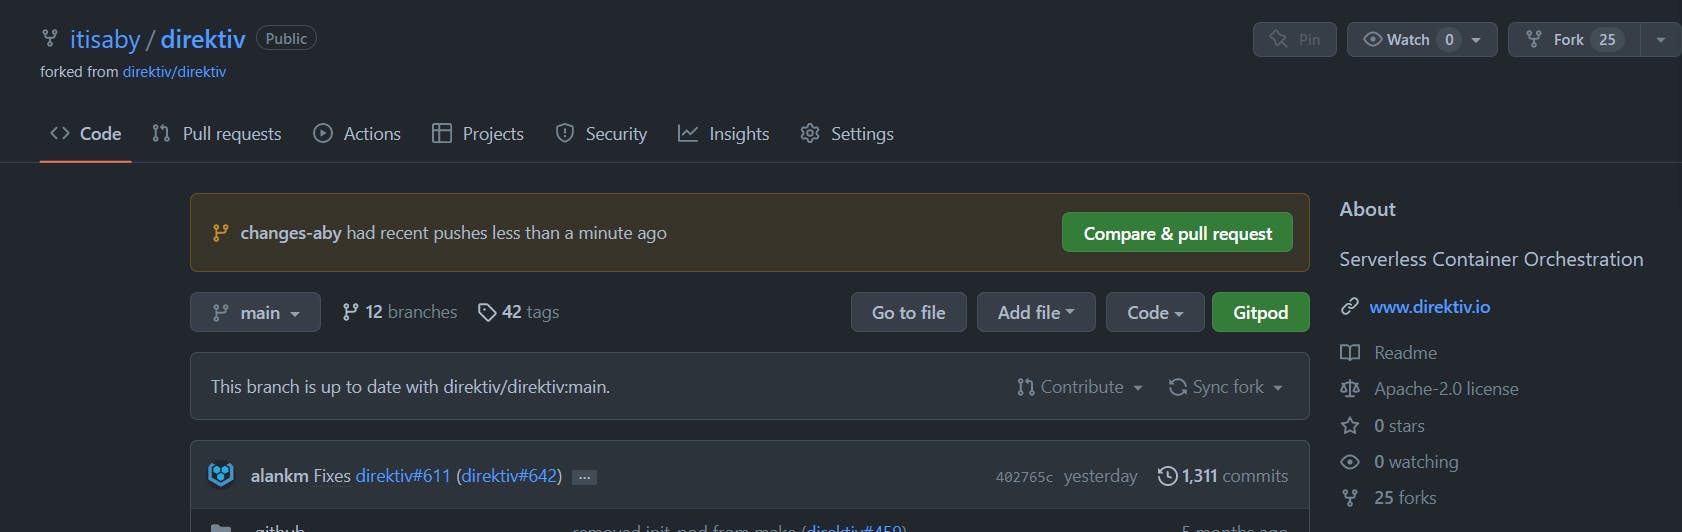
- Forking the Repo
- Cloning into the Local system.
git clone https://github.com/itisaby/direktiv - Changing the Branch
git checkout -b <Branch Name> - Making the Appropriate Changes
- Staging it using
git add . - Committing the code using
git commit -sm "MESSAGE" - Finally pushing it on the Forked repo in the branch we created locally
git push origin <Branch Name> - Then I got a Create PR Option in my forked repo:
- But, after creating a PR I got to see this:
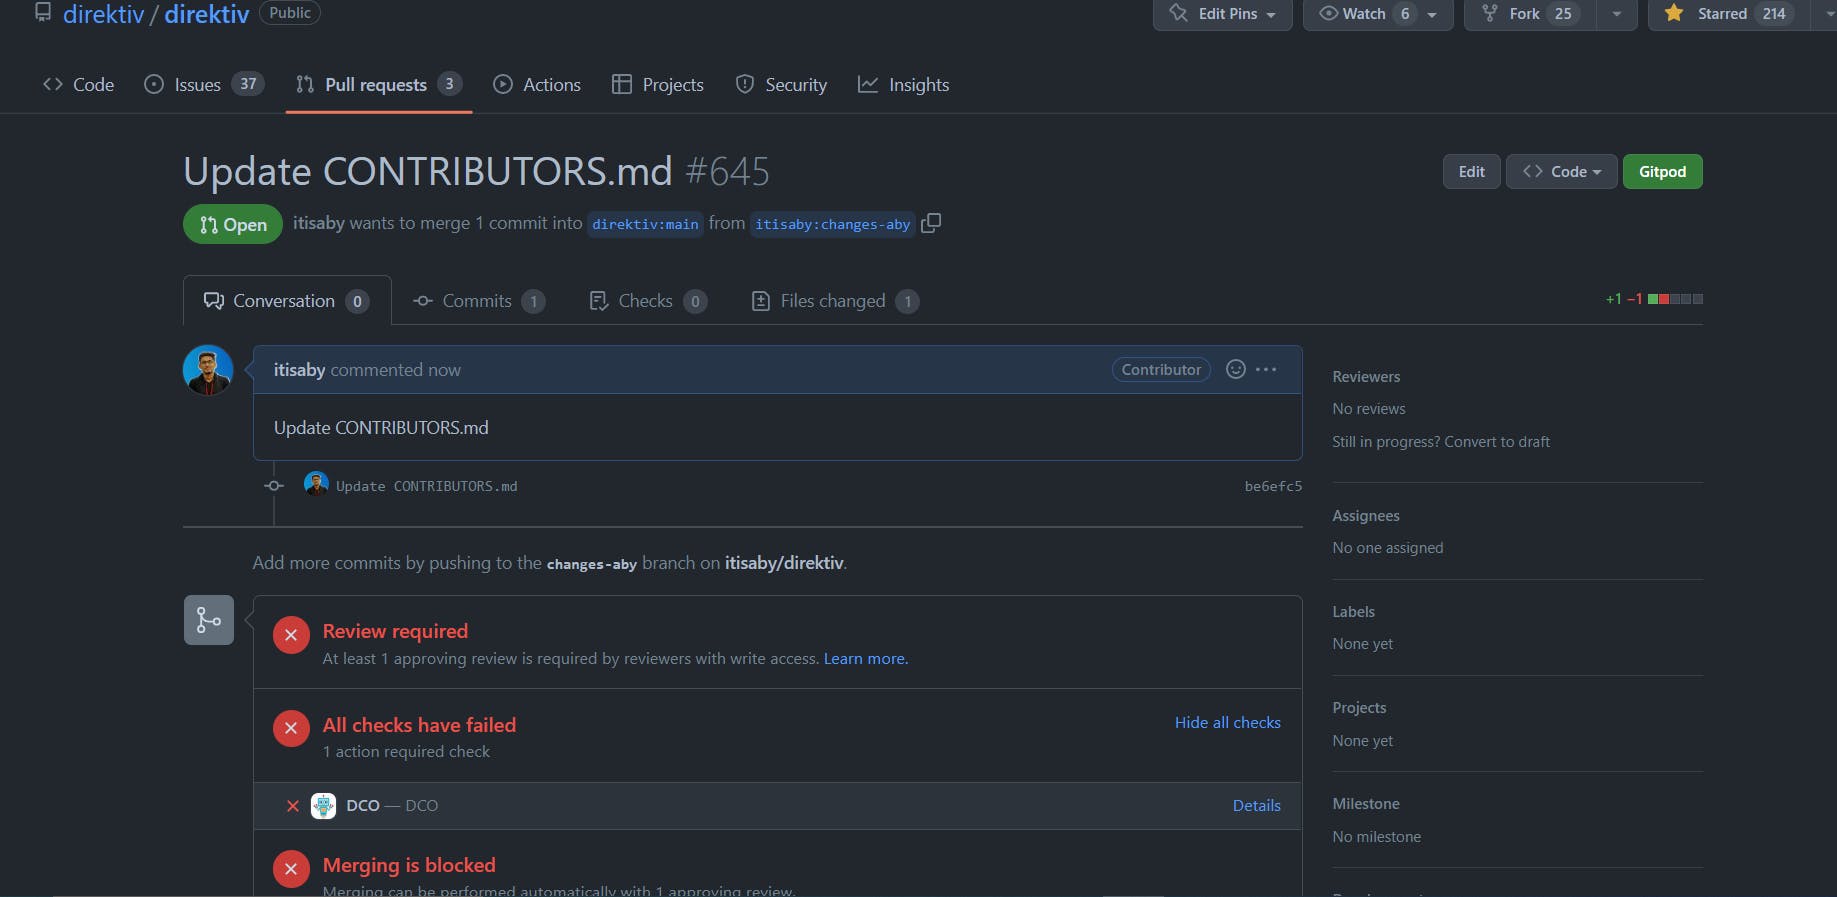 As you can see, it says the merging is blocked, as we need to have a Signed Commit. You can check more about it by reading this doc
After that, I reverted back to the old version using
As you can see, it says the merging is blocked, as we need to have a Signed Commit. You can check more about it by reading this doc
After that, I reverted back to the old version using git revert <Commit ID>git commit -S -sm "update CONTRIBUTORS.md"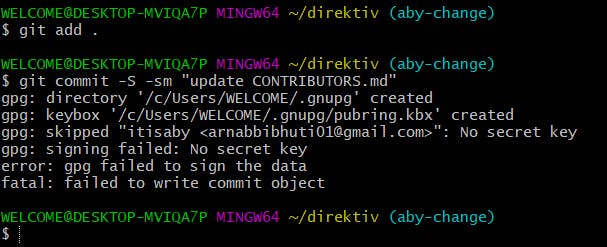 As you can see from the error message that the gpg key failed. This is because we haven't added any GPG key in our local system, through which we can make signed commits.
So now we need to see how to add a GPG key to our local system and make signed commits.
As you can see from the error message that the gpg key failed. This is because we haven't added any GPG key in our local system, through which we can make signed commits.
So now we need to see how to add a GPG key to our local system and make signed commits.Adding GPG Key in our Local System
- First check whether you have an existing gpg key with this command:
gpg --list-secret-keys --keyid-format=long
- Since we don't have a gpg key, so we need to generate it using this command:
gpg --full-generate-key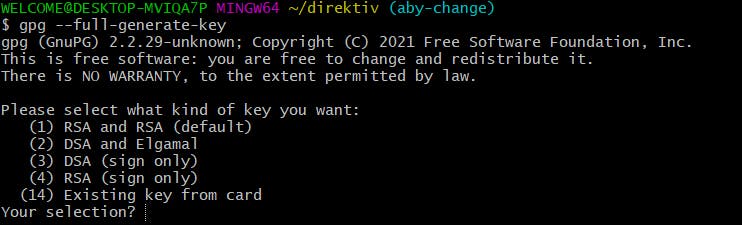 Choose the first one that is the default:
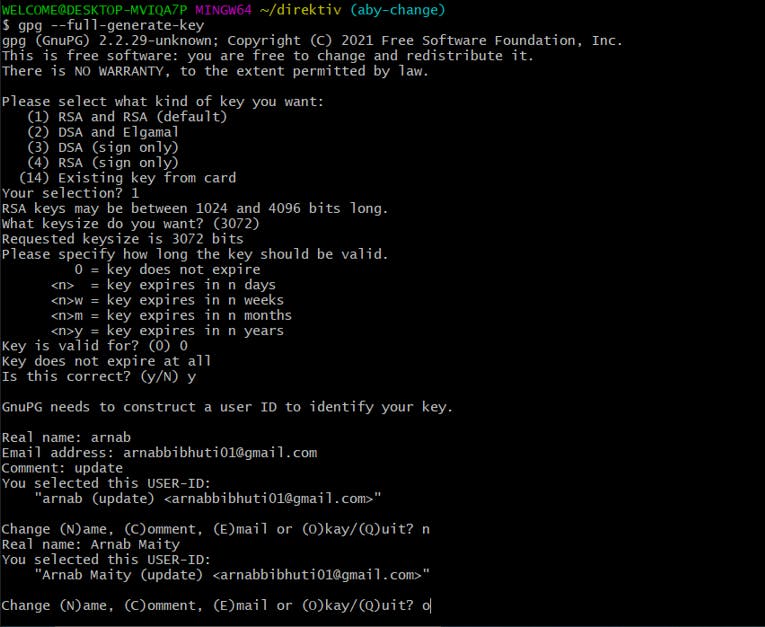
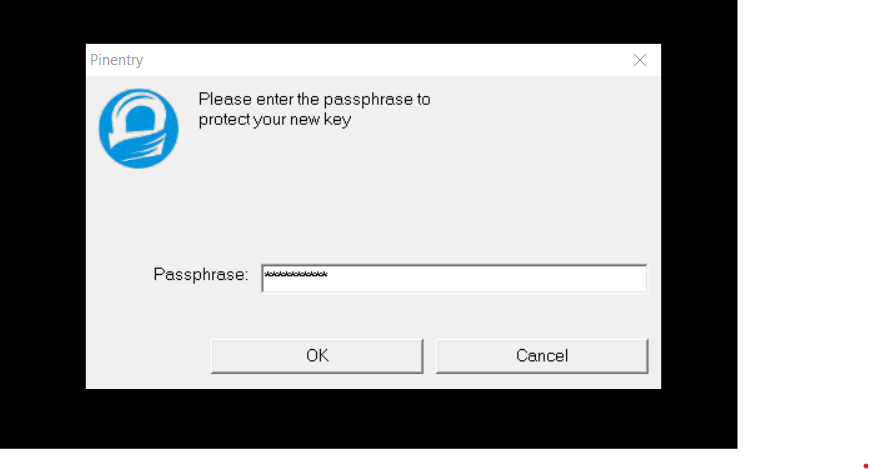
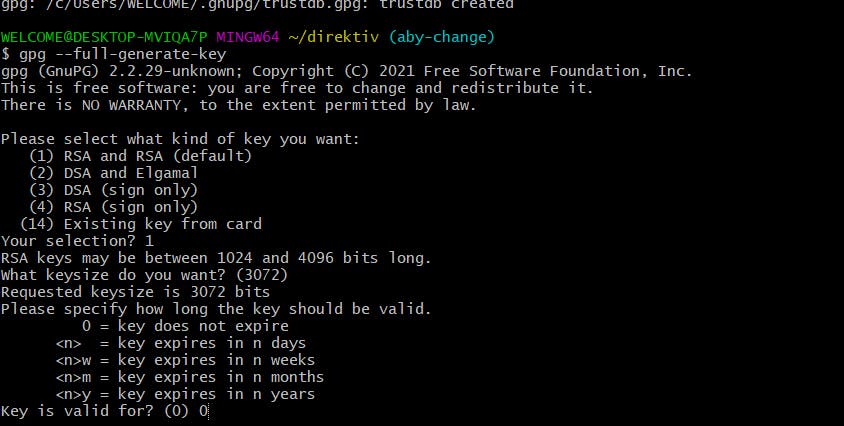 Choose All the default option and then it will ask for your name, email, and some comments. Finally, it will ask for a passphrase where you can write a password.
 Now if you want to check the generated key you can check by using the previous command:
gpg --list-secret-keys --keyid-format=long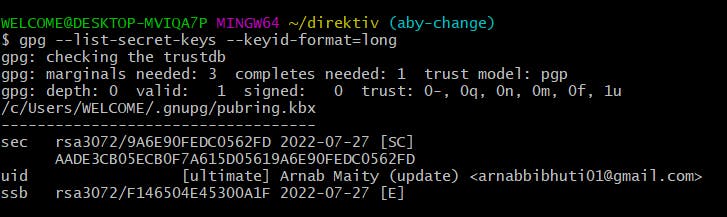 The Key which is generated it is
 AADE3CB05ECB0F7A615D05619A6E90FEDC0562FDin this case, it will be different in your case. - We need to run the below command, which prints the GPG key ID in ASCII armour format:
gpg --armor --export AADE3CB05ECB0F7A615D05619A6E90FEDC0562FD-----BEGIN GPG PUBLIC KEY BLOCK----- . . . ---END GPG PUBLIC KEY BLOCK----- - Tell Git about the GPG key.
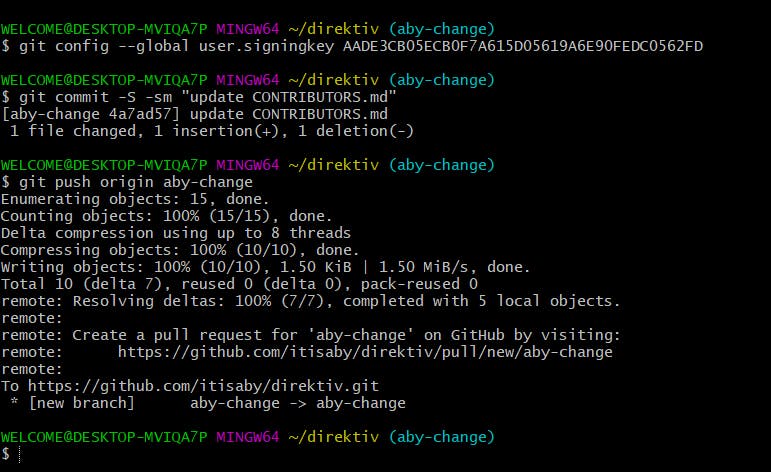
git config --global user.signingkey AADE3CB05ECB0F7A615D05619A6E90FEDC0562FD - You need to configure the gpg with all your commits:
git config --global gpg.program gpg
After this, Now try to commit your changes using:
git commit -sm "add terraform template(example)" -S